After reading this article you will know what a root flare is, why it is vital to the health of your trees and what to do if a root flare is not exposed. A common issue customers consult with Romeo Tree Service about goes something like this: “I planted my trees five years ago. They have hardly grown, have dead limbs and few leaves. My trees always appear as though they are about to die but never do.” The solution usually is to expose the root flare. The first spring with a newly exposed root flare results in a highly vigorous tree.
Keeping root flare exposed is essential to every aspect of a tree’s health. Trees with root flares that are covered with soil or mulch will have a failure to thrive resulting in dead limbs, stunted growth and decreased foliage. A covered root flare may also be thought of as the tree being buried too deep. Keeping root flare exposed is easy to do making it a simple fix for the ailing tree here in Tucson’s Sonoran Desert.
What is root flare?
Root flare is the portion of the tree where trunk wood becomes root wood. It is easily identifiable because of the flare that emerges just before the tree enters the ground as opposed to the mesquite or palo verde looking like a post or pencil in the ground. Root flare begins where the first lateral root/s exit/s the trunk. These first lateral roots will most of the time remain above ground for a few inches to a few feet then gradually sink under the soil.
Why to keep root flare exposed.
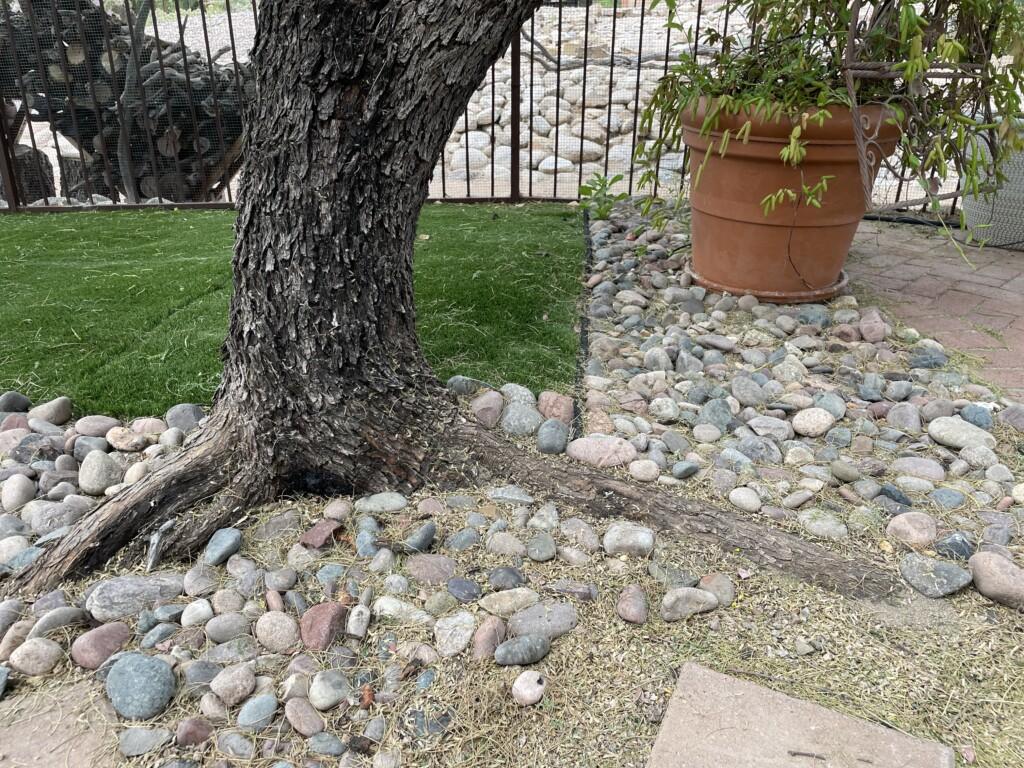
Root wood thrives underground and does not mind being above ground. Unlike root wood, trunk wood only thrives when above ground exposed only to the air. When trunk wood is constantly exposed to moisture either through being buried in soil or mulch or from the constant onslaught of a lawn sprinkler then rot and decay result. The photos below show well exposed healthy mesquite root flares with two first lateral roots indicating the start of the root flares.
Note: these root flares did not need to be exposed as they were never buried or covered.
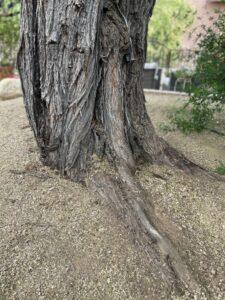
First lateral roots should not be confused with supplemental roots which grow over time as a result of the trunk having been covered with soil as in the photo to the right. This mesquite still needs more excavation since its root flare is still not exposed.
How to expose root flare.
Exposing a root flare can be laborious but is simple. It involves excavating the soil that is covering the root flare. The deeper the root flare and trunk have been buried the further out the soil excavation will need to be. Gradually taper up as you reach the circumference of the excavation. The end result appears to look like a well around the tree, but remember, it is not a well for watering. It is simply the space where soil was excavated to expose the root flare. Watering inside this area would defeat our purpose of exposing root flare in order to keep it dry and away from a moisture source. Pro tip #1: Try to minimize damage to the root flare and roots by using these three tools when exposing root flare. A hoe for scraping, 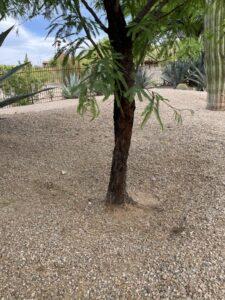
 not striking, a sharp, but not too sharp, hand sized rock also for scraping, and a sharp stout wooden stick for digging (usually from a dead limb found on the ground). Pro tip #2: If the tree’s surroundings do not allow for the excavation to be wide enough so that taper is not too steep then you can place rocks along the top end to keep soil in place (rip rap). Pro tip #3: If finding a place to put all the soil you are excavating is a challenge, here is a solution. Place the soil in a thin layer next to a wall. This is ideal when there may be a drainage issue anyway along a wall. In other words, when the soil is already too low near a wall. If you have decorative gravel near the wall then be sure to first scrape the gravel away from the area then replace it over the thin layer of new soil. No one will know the wiser! (Yes, that was a Laurel & Hardy reference.)
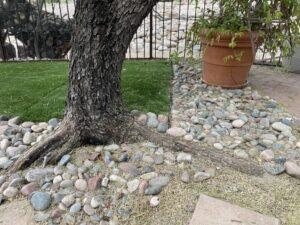
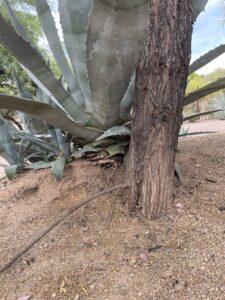
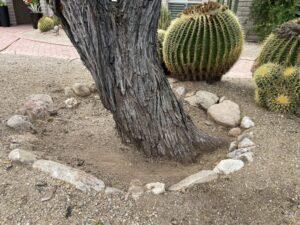
Just above are two examples of root flare exposures. The one on the left did not require rip rap rock since it was very shallow. The one on the right had limited space due to the Golden Barrel cacti and so required rip rap rock to hold the soil in place.
You can learn more about Mesquites and Palo Verdes here with our 45 min video, “Mesquites and Palo Verdes, A Home Owner’s Guide”. You can also visit our YouTube channel here.
Angelo Romeo
ISA Certified Arborist WE-10202AT
May 1, 2023